Bruker NPFLEX
Large Sample 3D Surface Metrology
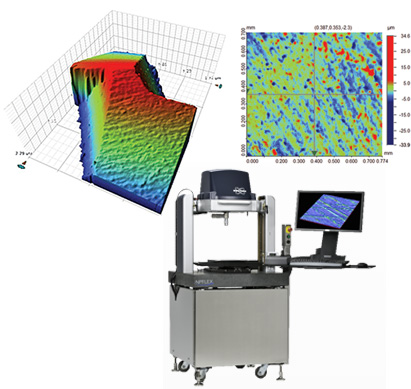
The Bruker NPFLEX delivers flexible, non-contact, 3D areal surface characterisation for large samples, such as orthopedic medical implants and large parts in aerospace, automotive and precision machining industries. Benefit from data density, resolution and repeatability beyond what is possible with contact instrumentation, making the NPFLEX suitable as either a complementary instrument or a single metrology solution. The system is flexible and high-throughput, delivering accurate measurements for precision manufacturing, to achieve tighter tolerance, more efficient processes and high quality end products.
- Flexible measurements for unusual shapes and angles
- Samples up to 13″ tall
- Open gantry, custom fixturing and optional swivel head
- Definitive results from high-density, 3D areal information
- Each measurement produces complete surface information for multiple analyses
- Nanometer resolution
- Interferometry provides sub-nanometer vertical resolution at every pixel
- Industry-proven technology for statistical certainty and tighter tolerance
- Fast data acquisition
- Minimal sample preparation
- Large field of view characterises more information than contact measurement techniques
Contact us for more information and quotes:
+44 (0)1223 422 269 or info@blue-scientific.com
Download the brochure Contact us
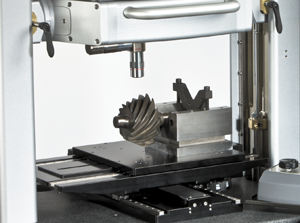
Measuring a gear tooth of a hypoid pinion gear
Applications
Automotive and Aerospace
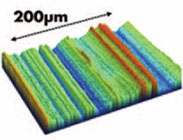
The advanced 3D optical profiling technology of the NPFlex helps engineers understand wear and correlate it to manufacturing processes and/or wear mechanisms. Quantitatively measure wear, surface roughness, lead angles and more to meet industry tolerances. Characterise large areas by stitching multiple measurements together. The system can also highlight data trends such as waviness or lay, and features such as a predominance of ridges or scratches, that would not be shown by a 2D trace.
Shafts, mating or connecting surfaces and close-tolerance or irregularly-shaped parts can be physically challenging to analyse. The NPFlex is capable of measuring difficult areas such as machine lead or “lead angle” both quantitatively and repeatably.
Case Studies
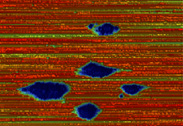
Corrosion in Oil Transportation and Refining
Unavoidable trace amounts of water and sediments in crude oil cause corrosion, which eventually leads to leaks and pipeline failures. Heavy crude oil can also have a higher acid or sulphur content, which is corrosive at high temperatures in refineries.
Structural damage can be imaged and quantified quickly using 3D optical microscopy, for research into oil production materials and additives, and how they affect corrosion rates. The Bruker NPFlex delivers high quality images and metrology to clearly document and trace changes over time in oil transportation and refining infrastructure, as well characterising the effect of additives and other preventative measures.
High resolution, large field-of-view images and highly accurate vertical scale information make it easier to characterise surface damage and corrosion. Hundreds of useful parameters can be calculated from 3D analysis , including the volume of material lost over time, ratios of peaks to valleys and directionality of corrosion.
Quality Control in Precision Manufacturing
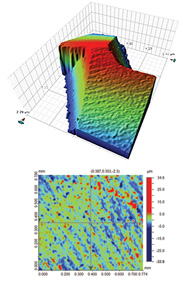
The tribology of tools and metal parts is very important for manufacturers, and characterising tool wear often highlights correlation between the roughness of a tool’s surface and its function. Simple changes in a tool’s surface texture and dimensions can improve its lifetime. 3D optical microscopy is used for testing to pin down the optimum performance parameters, as well in as quality control to ensure specified parameters are met.
Quality control of blade surface finish and cutting angles is vital in all applications, from medical incisions to shaving products. Optical profiling quickly and efficiently measures edge quality and sharpness, as well as many other parameters. As a true 3D measurement technique, optical profiling can measure the directionality and frequency of machining marks, the location and extent of defects and hundreds of parameters that are difficult or impossible to analyse using 2D techniques.
The Bruker NPFlex provides high accurate data about surface parameters, along with visually telling images. Accurately and consistently monitor quality in precision machining.
Medical Device and Implant Quality Control
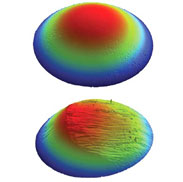
Orthopedic implants and other medical devices vary hugely in size and shape, and are manufactured to extremely tight tolerances. Defects of every kind must be defined and corrected.
Quality control of these tight specifications often requires many different metrology instruments. The Bruker NPFlex replaces this variety of instruments, providing highly accurate surface metrology measurements across the entire orthopedic implant and medical device manufacturing production cycle.
The NPFlex is the first optical metrology system built to handle nano- to macro-features on samples of varying shapes and sizes. All material types can be measured, and the dynamic range both rough and smooth surfaces. Acquire data-rich, 3D images with outstanding resolution, and greater repeatability than contact instrumentation.
Non-contact, non-destructive characterisation is ideal for delicate parts. Measurement is fast, accurate and repeatable. It can also be completely automated for batches and pass-fail tests on user-specified parameters. Acquire lateral information and nanometer-resolution height information for complete surface measurement and mapping with micron-level lateral resolution across the entire surface.
